A roof installation is an important home renovation that is essential for safeguarding a home’s structure. The roof protects the inside from weather elements, aids in proper water drainage, and contributes to maintaining a pleasant indoor climate. Since the roofing system is constructed in layers and requires specific materials, the installation involves several systematic steps.
For homeowners who haven’t experienced this process before, it can be beneficial to know what generally occurs before, during, and after the roof installation. Being aware of what to expect enables homeowners to prepare their home, minimize surprises, and grasp how the work unfolds.
 Key Takeaways
Installing a roof involves multiple stages, including preparation, removal of existing materials, inspection, installation of protective layers, and placement of new roofing materials.
Homeowners may notice noise, movement on the roof, and temporary activity around the home during the installation process.
The roof deck must be inspected before new materials are installed to ensure a stable foundation.
Protective layers such as underlayment and flashing help support the performance of the roofing system.
Cleanup and final inspection are important steps that occur once the roofing materials are installed.
Understanding the Purpose of Roof Installation
Installing a roof involves more than just laying down shingles or panels on a house. Roofing systems consist of various elements that collaborate to control water movement, defend against environmental conditions, and uphold structural integrity.
Every layer within the roofing system contributes to the roof’s overall functionality. These layers typically include the roof deck, underlayment, flashing, ventilation parts, and the outer roofing materials. During the installation, each element must be positioned with care to ensure that the complete system operates effectively.
Due to this layered design, the installation process adheres to a specific order that enables each phase to enhance the preceding one.
Preparing the Property for the Installation of a Roof
Prior to starting the installation, roofing teams usually get the property ready to establish a safe and orderly work environment. This setup helps safeguard nearby areas and guarantees that materials can be delivered and managed effectively.
Preparing the Work Site
Homeowners might be requested to clear the outdoor areas surrounding the house before installation starts. Items like patio furniture, gardening tools, decorative items, and vehicles may need to be relocated from the immediate work zone.
Clearing these items helps avoid unintended damage and allows for access to equipment and materials.
Safeguarding Landscaping and Surfaces
The process of roofing can create debris when old materials are taken off and replaced with new ones. Protective covers can be utilized to safeguard landscaping elements like plants, garden beds, or paths.
These covers also aid in making the cleanup process easier once the work is complete.
Interior Factors
Even though roof application occurs outdoors, residents may perceive vibrations or movement within their homes. Objects mounted on walls or kept in attics might be displaced during the process.
To prevent potential damage, some homeowners opt to temporarily secure or remove delicate decorations prior to the installation.
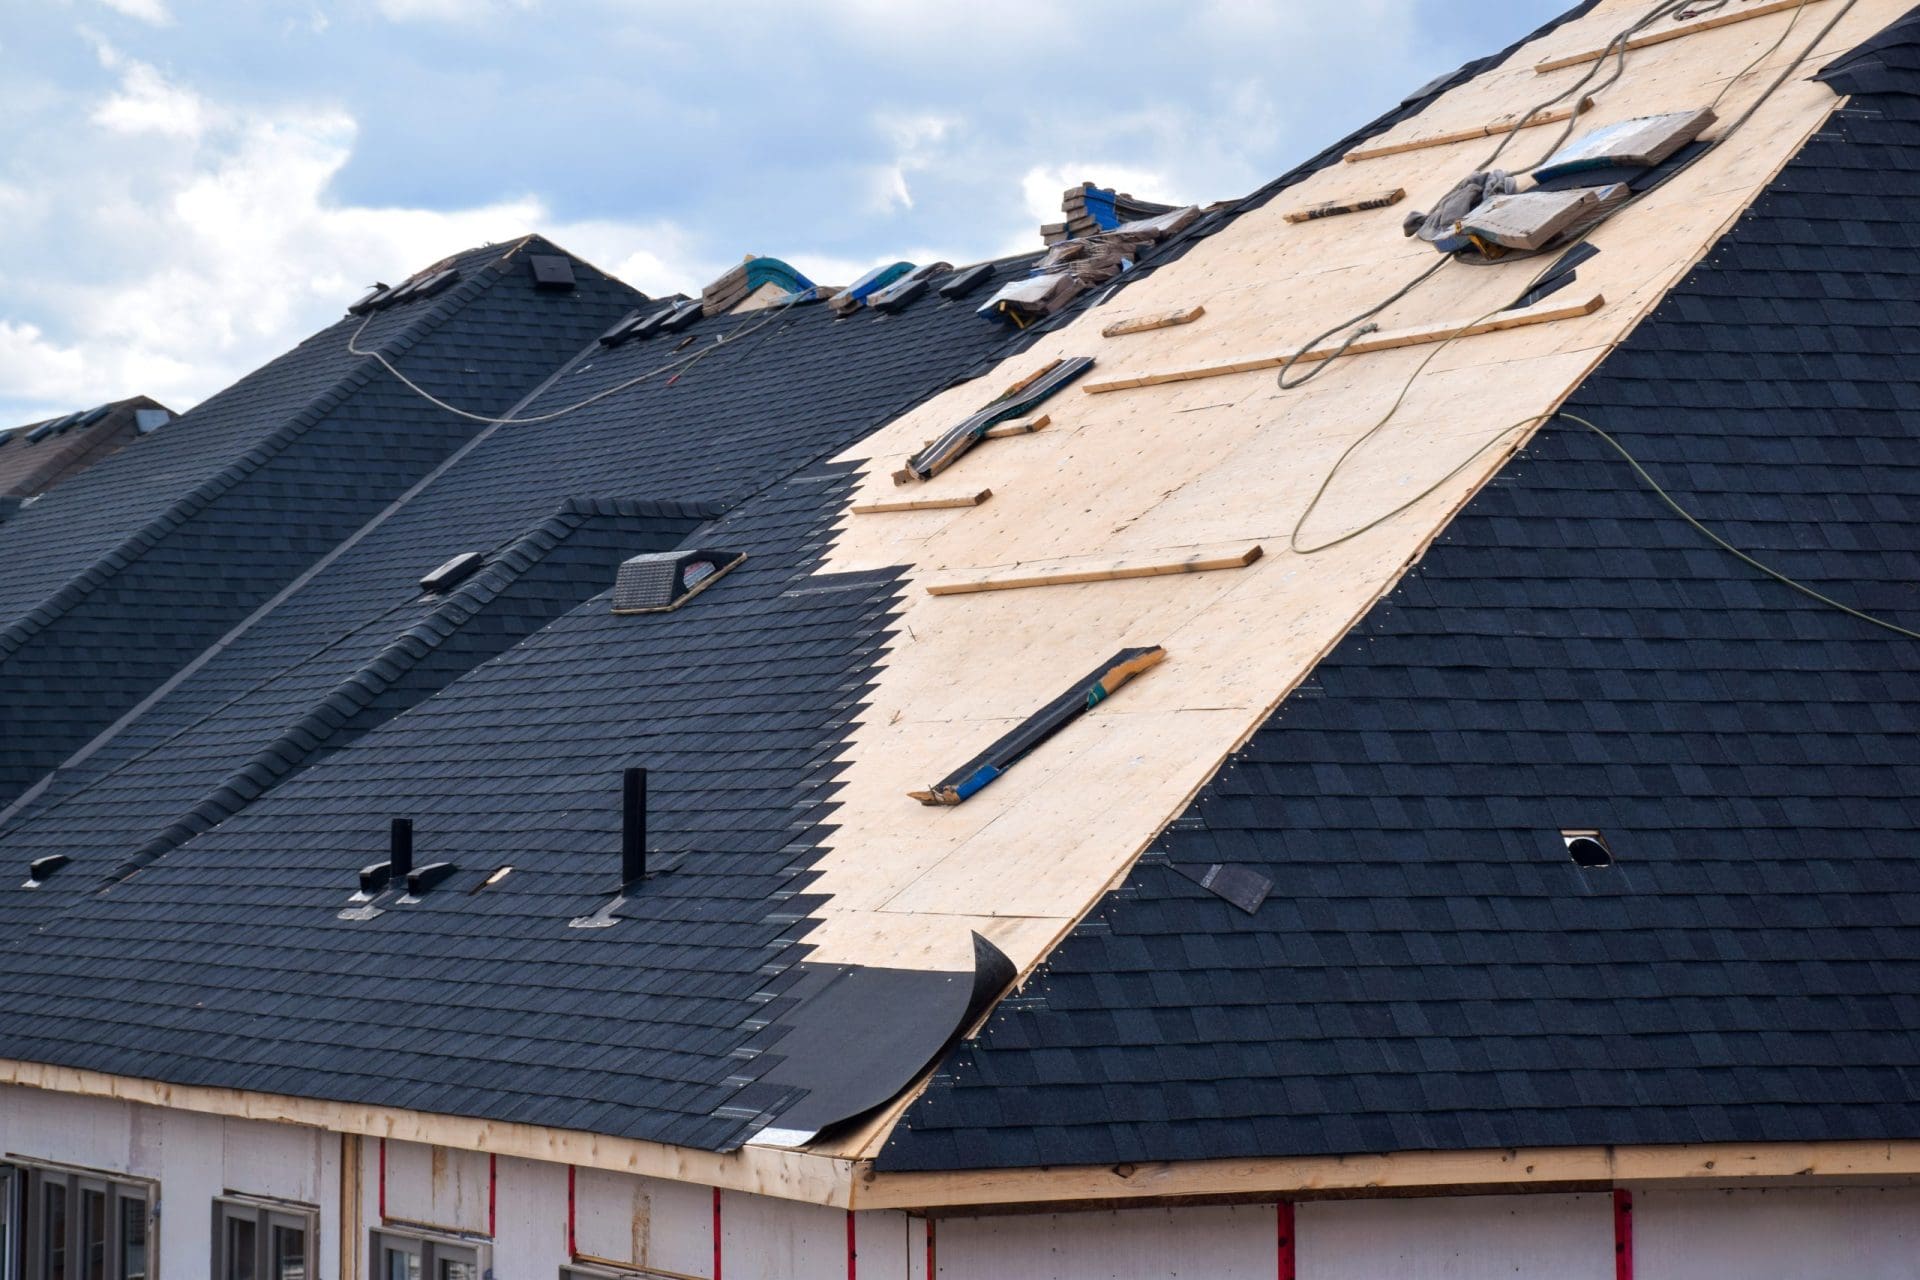
Removing Existing Roofing Materials
If the home already has roofing materials in place, the installation process typically begins with removing them. This step is often referred to as the tear-off phase.
Why Old Materials Are Removed
Removing existing roofing materials allows the installation team to examine the surface beneath them. The underlying structure, known as the roof deck, must be visible so that it can be inspected and prepared for the new roofing system.
Old shingles, nails, flashing components, and other materials are carefully removed and placed into designated disposal containers.
Managing Debris
The removal process can create noticeable debris, including small fragments of roofing materials. Roofing crews typically organize debris collection so that materials are handled safely, and the property remains manageable throughout the installation.
Noise during this stage is common because tools are used to separate materials from the roof surface.
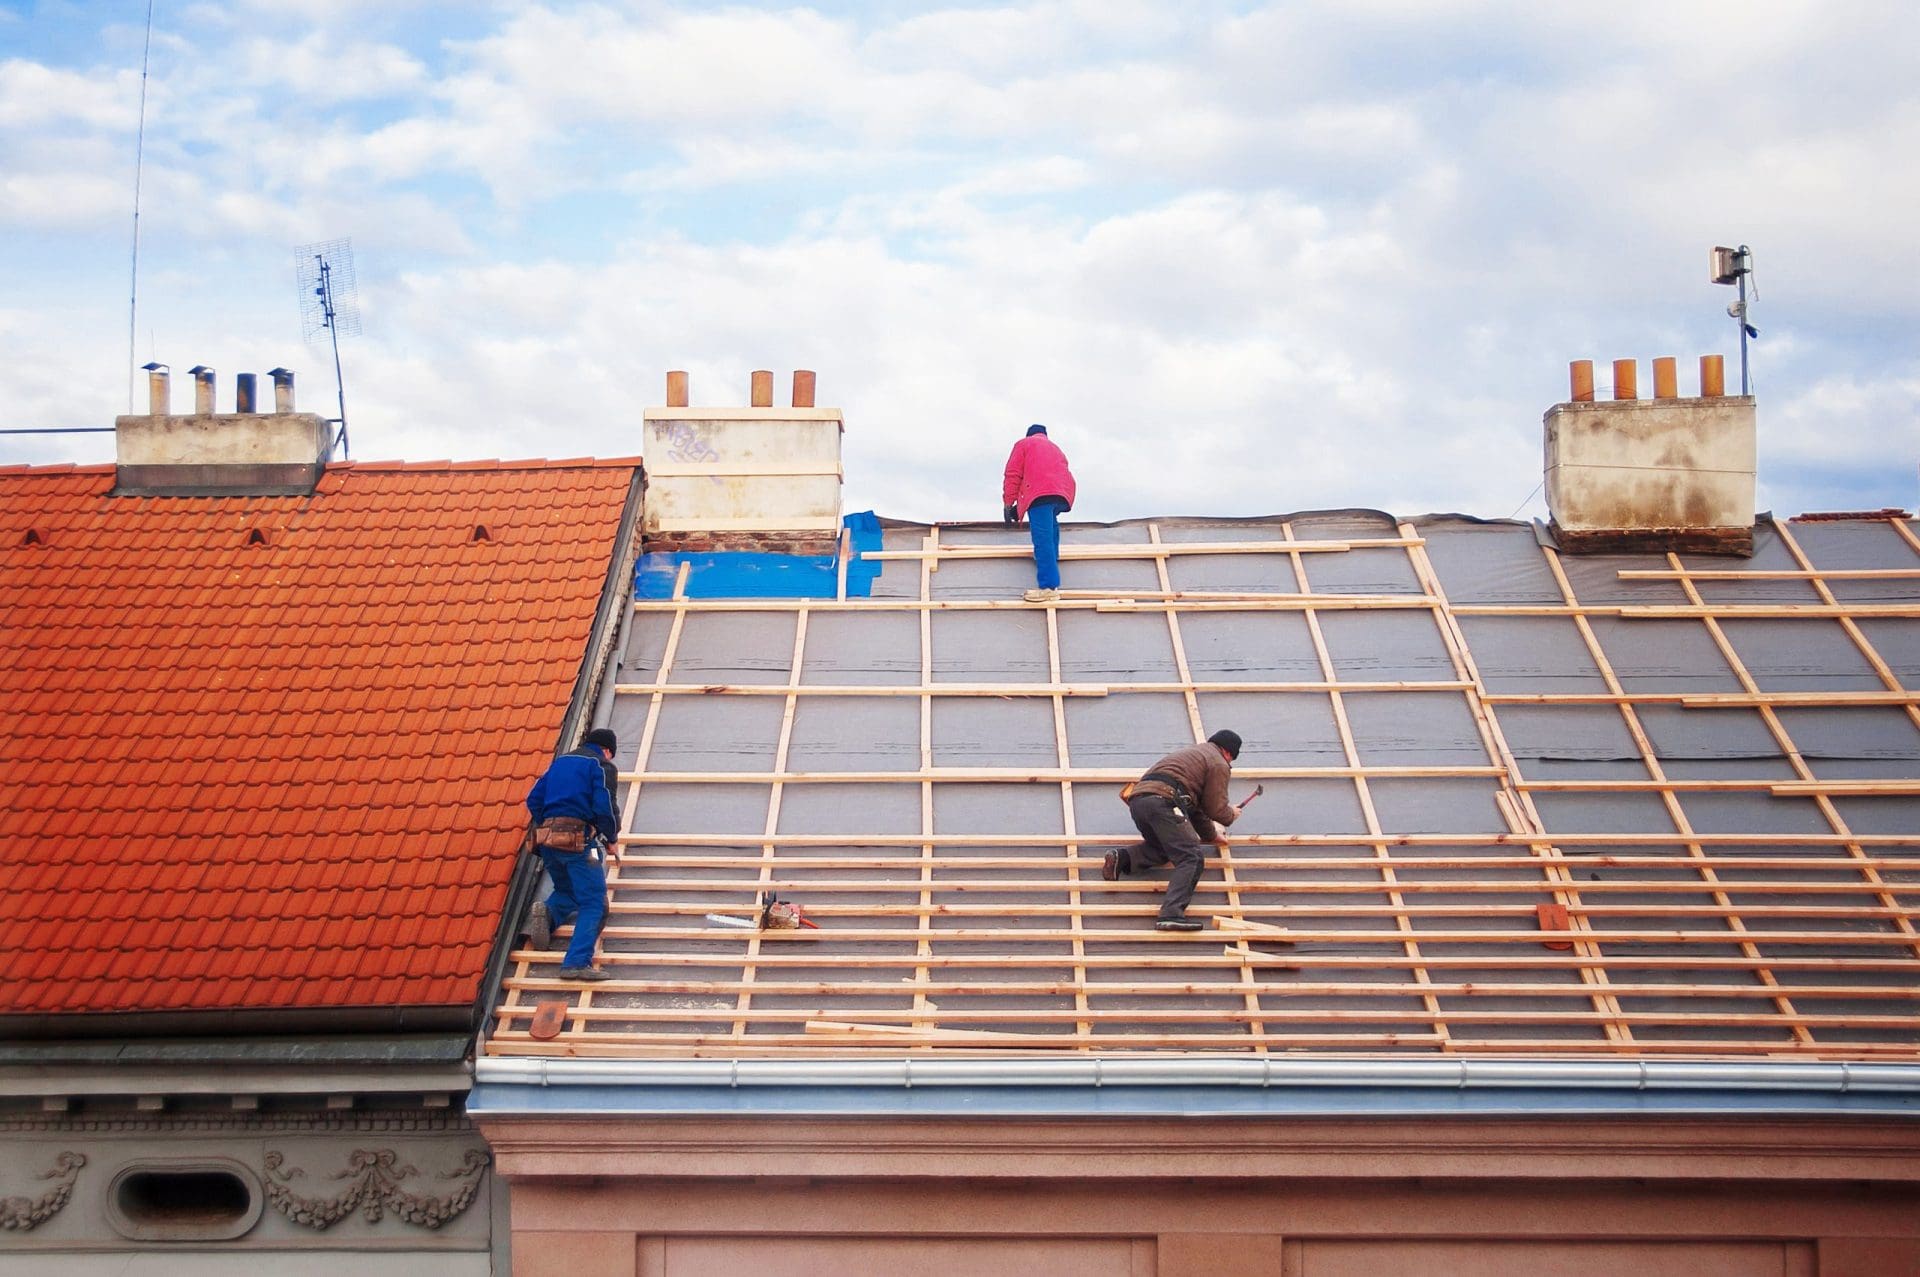
Inspecting the Roof Deck
After the old roofing materials have been removed, the roof deck becomes fully visible. The roof deck serves as the structural base that supports the rest of the roofing system.
Assessing Structural Integrity
The installation crew inspects the deck to verify its stability and its ability to support the new roofing materials. If there are parts of the deck that need repairs, those issues must be resolved before proceeding with the installation.
This phase ensures that the new roofing system is placed on a reliable foundation.
Preparing the Surface
Once the deck has been inspected, it may be cleaned and prepared for the next stage of the installation. A clean, stable surface allows protective layers to be installed properly.
Installing the Underlayment
Underlayment is typically one of the initial layers installed over the roof deck. It serves as a protective shield between the deck and the visible roofing materials.
Function of Underlayment
The main function of underlayment is to offer an extra layer of defense against moisture and environmental elements. It assists in directing water away from the roof deck and enhances the longevity of the entire roofing system.
Underlayment is meticulously installed across the roof surface to ensure uniform coverage.
Installing Flashing and Protective Components
Flashing is another important element of roofing. These components are installed in areas where the roof meets other structures or where water may naturally collect.
Common Flashing Locations
Flashing may be installed around:
- Chimneys
- Roof valleys
- Vents and pipes
- Roof edges
- Areas where the roof meets vertical walls
These locations are more vulnerable to water intrusion, so flashing helps guide water away from these areas and toward drainage pathways.
Additional Protective Features
Depending on the design of the roof, other protective components may also be installed during this stage. These components help support ventilation and moisture control within the roofing system.
Installing the Roofing Materials
After the protective layers are in place, the installation team begins installing the visible roofing materials.
Placement Process
Roofing materials are typically installed starting from the lower edge of the roof and working upward. This method helps ensure proper overlap between layers so that water flows downward and away from the structure.
Each piece is positioned carefully to maintain alignment and consistent coverage.
Securing the Materials
Roofing materials must be secured properly so they remain stable under changing environmental conditions. The installation team follows the recommended methods for attaching materials and ensuring they remain in place.
Correct placement and alignment contribute to both the appearance and function of the finished roof.
Final Inspection and Cleanup
Once the roofing materials have been installed, the project moves into its final stages.
Reviewing the Installation
A final review helps confirm that all roofing components are positioned correctly and that the installation process is complete. Edges, flashing areas, and roof features may receive additional attention during this stage.
Cleaning the Work Area
Roofing can leave behind small debris such as nails or fragments of materials. Cleanup involves removing leftover materials and clearing the surrounding property.
The goal of this step is to return the property to an orderly condition once the installation is finished.
What Homeowners May Notice During Installing a Roof
During the installation of a roof, it is normal to notice increased activity around the home.
Common observations may include:
- Sounds from tools and movement on the roof
- Materials are being delivered or moved around the property
- Temporary restrictions around certain areas of the yard
- Workers accessing the roof using ladders or equipment
Weather conditions may also affect the timing of the installation process. If conditions change, work may pause until it is safe to continue.
Homeowner Preparation Checklist
Homeowners can take a few simple steps before the project begins to help the installation process go smoothly.
 Roof Installation Preparation Checklist
 Roof Installation Preparation Checklist
Move vehicles away from the house or driveway
Clear patio furniture and outdoor items from nearby areas
Secure fragile wall decorations inside the home
Cover items stored in attic spaces if needed
Inform household members about the expected noise
Ensure pets remain safely indoors during the work
Completing these steps can help reduce disruptions and protect personal belongings.
Learn More Before the Installation of your Roof
If you’re considering a roof installation, speaking with a roofing professional can provide helpful guidance about preparation, timelines, and the overall process. For more information about roof installation services, visit the Brad Smith Roofing website or contact the team at 440-835-3377 to connect and learn more about roof installation.
Frequently Asked Questions
1. What is a roof installation?
A roof installation is the process of placing a new roofing system on a home. This process typically involves removing old materials, inspecting the roof deck, installing protective layers, and adding new roofing materials.
2. Will my home be noisy during roof installation?
Roof installation involves tools and movement across the roof surface, which can create noticeable sounds during the workday.
3. Do homeowners need to leave the house during installation?
Many homeowners remain inside during the installation of the roof. However, some choose to spend time away due to the noise and activity involved.
4. Why is the roof deck inspected?
The roof deck provides the structural base for the roofing system. Inspecting it helps ensure the surface can properly support the new roofing materials.
5. What is roofing underlayment?
Underlayment is a protective layer installed between the roof deck and the outer roofing materials. It helps provide an additional barrier against moisture.
6. What is flashing on a roof?
Flashing is a material installed around roof features such as vents, chimneys, and valleys. It helps direct water away from these vulnerable areas.
7. How should homeowners prepare for installation day?
Homeowners may prepare by clearing outdoor areas, moving vehicles, securing fragile items inside the home, and ensuring pets remain indoors.
8. What happens after the roofing materials are installed?
After installation, the roof is reviewed, and the property is cleaned to remove leftover materials and debris.
9. Can weather affect installation?
Weather conditions can influence roofing work. If conditions become unsafe, installation may pause until it is safe to continue.
10. How can homeowners monitor their roof after installation?
Homeowners can occasionally observe the roof from ground level and schedule periodic inspections to help identify visible concerns early.

Stacey is a graduate of BGSU, where she graduated with a B.A. in Interpersonal Communication and a Minor in Marketing. Stacey’s focus of study was Business Management. Stacey has been with the Company since November of 1999, she became the Office Manager in 2003. Stacey now serves as the Vice-President for the Company. She has been a Member of the Rocky River Chamber of Commerce since 2016. Stacey and her brother, Drew Smith, continue to follow in their Father’s footsteps bringing new innovations, new programs, new products and new techniques to help the Company’s efficiency, safety and customer satisfaction.